Challenge DV
Website Manual
Looking for specific content? Use the quick search function Command+F (Mac) or Control+F (Windows) and type in the keywords.
Log in to my website Dashboard
Your website dashboard is where you can make as many (or few) changes to your website as you need.
Simply log into your dashboard by clicking here, then enter your website login details, which I sent via email.
Need extra admin/manager accounts? Send me a message with their email addresses to be added.
Text editing
If you need to edit or add any text to an existing text block, hover over your desired text block, then click the pen tool. Editing mode will allow you to edit text, links and formatting; such as if you prefer a piece of text to be underlined or made into a dot-point format.
Just be mindful to click the dave button in the toolbar when you're done. Otherwise, you will have to start over.
Image update and adjust
Editing images is almost the same as editing text. Just click the image, then hit the pen tool. A menu will pull out on the left-hand side of the screen. To change the image, click the replace image button and select your desired picture from your computer's files.
If you want to change the size of a photo, hover back over it on your webpage. Then, use the zoom slider to choose your desired size.
Be wary, that you can now stretch the image beyond its original dimensions, so it's important to ensure it doesn't pixelate.
To adjust the height of your photo, hover over the bottom of your image until a black arrow appears. Then, slide this up and down as needed. This arrow will snap to images and text to keep your webpage neat.
If you need to crop your image, left-click on any part of the image, then drag your image to your desired position.
You can also adjust the Width, Height and Alignment from the sidebar under Size.
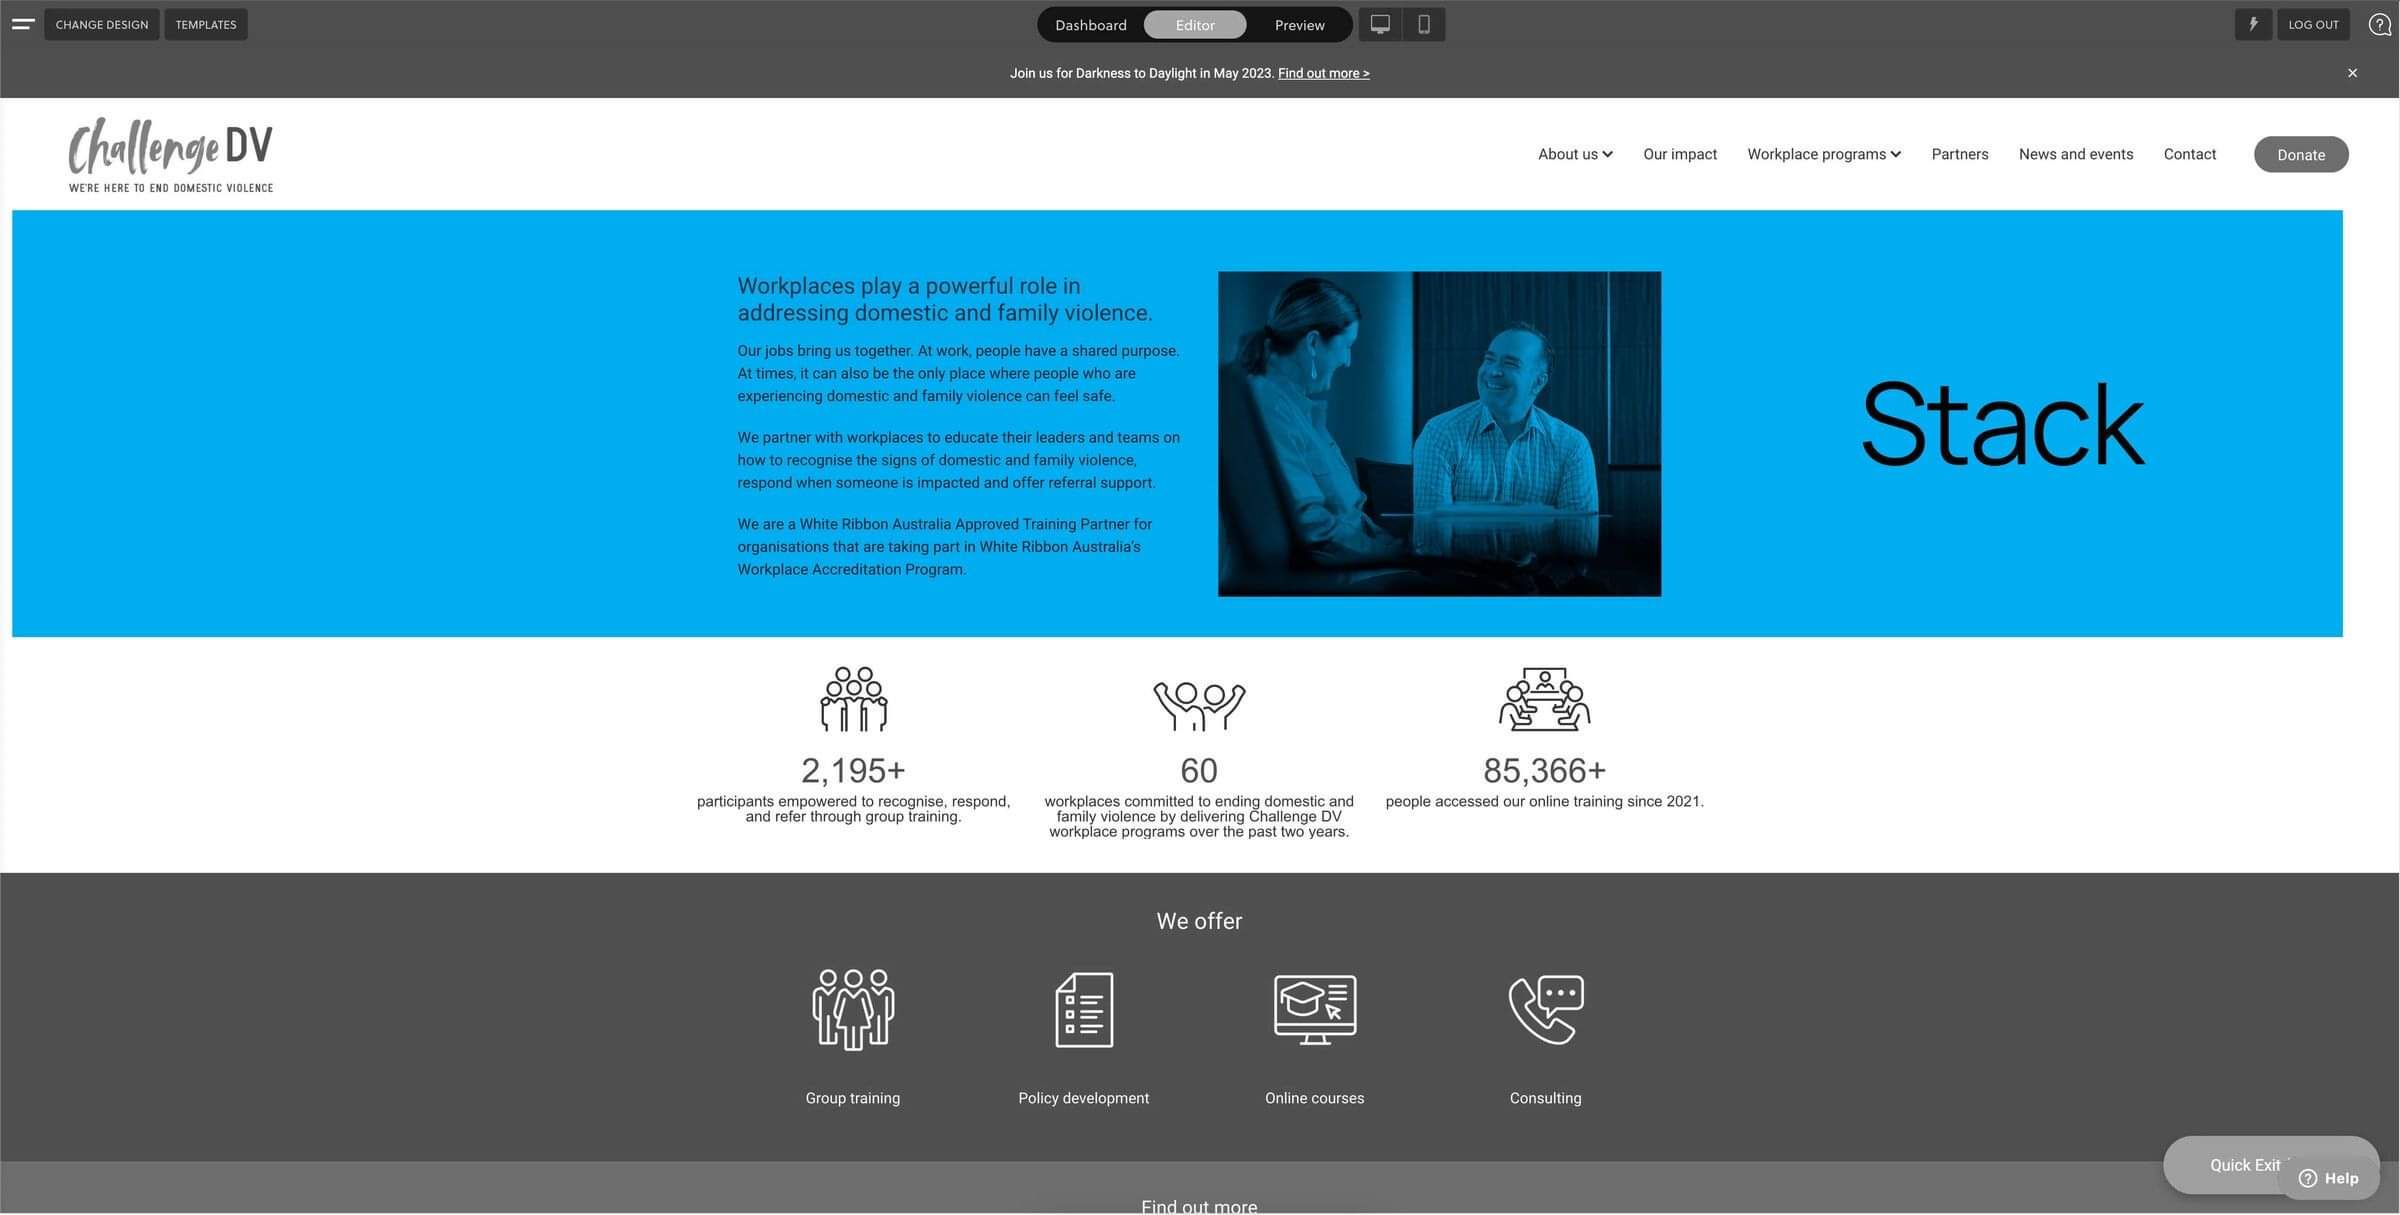
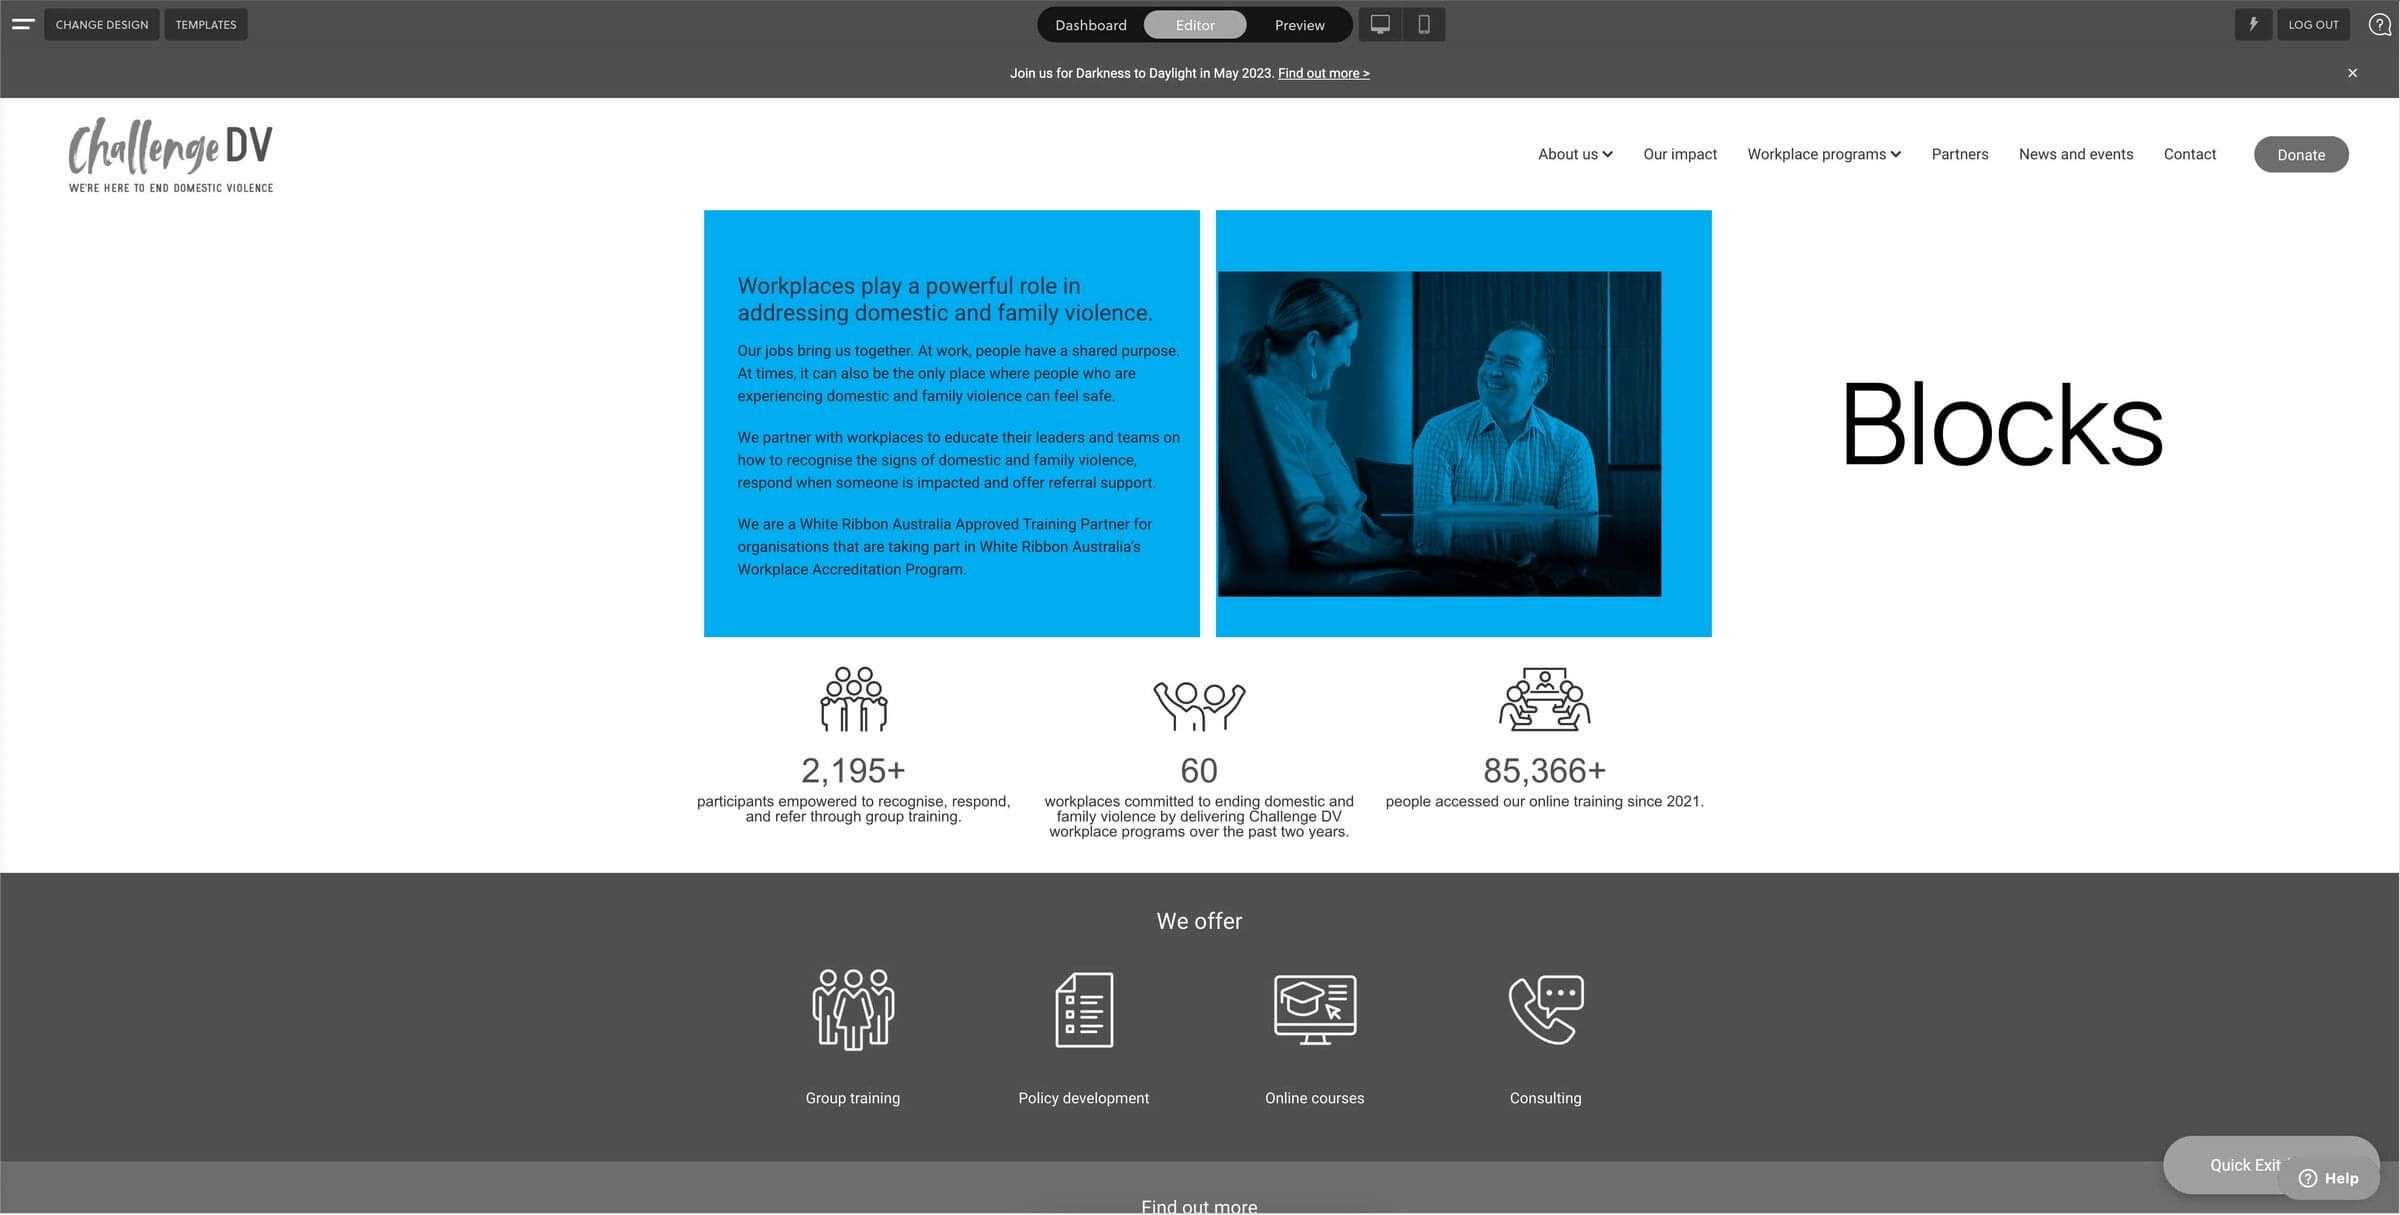
Blocks v.s. stacks
Blocks are the building blocks of your website, serving as the individual components that make up its content. These can include text, images, videos, maps, contact forms, blog posts, and products from your online store.
Stacks are the arrangement of multiple blocks, allowing for creative and customisable layouts for your web page. For instance, a stack at the top of your page could be a single-column introduction, while a stack further down the page could have a four-column arrangement or even showcase a unique design, like an Instagram feed or a slideshow.
Adding and copying a stack
The first step in creating a webpage is often adding a stack. When you first add a stack to a page, you may be prompted to do so. Alternatively, you can hover over an existing stack and click on the ADD STACK or + symbol that appears on the right side.
Once you click, a menu of options will slide out from the edge of the window. To save time, consider copying a pre-designed stack, which you can find conveniently categorised by use.
If you prefer a blank canvas, you may choose to add a Blank Stack. Most of these stacks offer column layouts, but there are also special stacks available for features like Instagram feeds, horizontal lines, slideshows, and galleries.
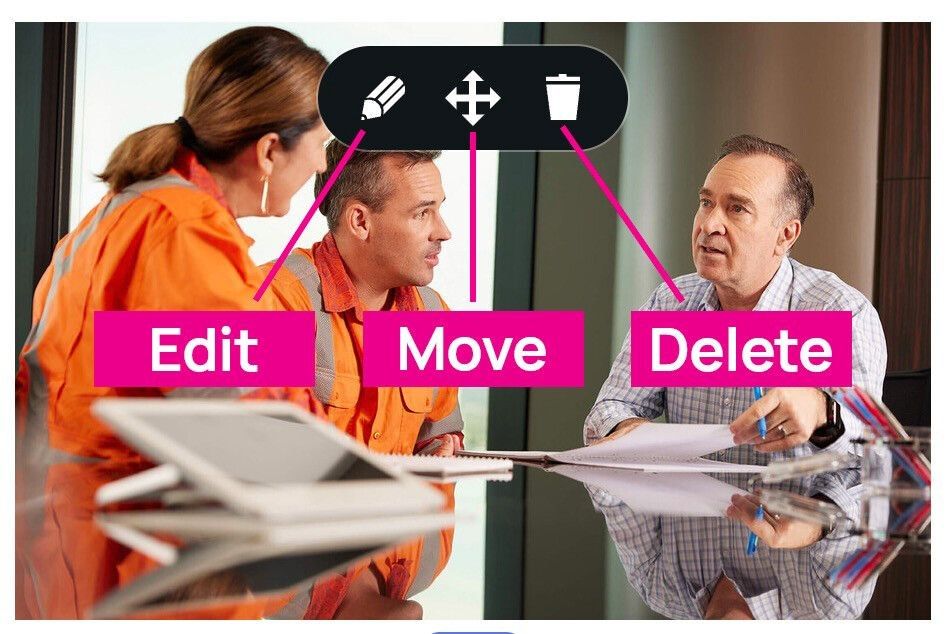
Adding, moving and deleting a block
Adding: To add a block, click on the "Add a Block" box and choose the desired block type. As you enable more features on your site (such as a blog or online store), more block options will become available. You can add multiple blocks to a single stack. The most commonly used blocks are text and pictures.
Editing: To edit a block, hover over it and click the pencil icon. The type of editing box that appears will depend on the block type. For example, clicking the pencil on a text block will bring up a text editor, while clicking it on a picture block will bring up the picture editing pane.
Moving: To move a block or stack, click the arrows icon and drag it to the desired position. Blocks can be moved up/down and left/right, while stacks can only be moved up/down.
Deleting: To delete a stack, click the rubbish bin icon. A confirmation prompt will appear, so you won't accidentally delete it. Click "Yes" to delete or "Cancel" to keep it.
Stack background
The Stack Background menu provides three options: Colour, Image, or Video. You may modify the background of the entire stack by selecting a colour, uploading an image, or embedding a video. For more information about Video Stack Background, see this help guide.
Call to Action Buttons
To add a button, simply add a new block and select 'button.'
To change the button style in the particular stack, click the rainbow button that pops up in the right sidebar. Click buttons, and a menu will open up. You can quickly change the styles by clicking the button styles and selecting a pre-designed section.
If you prefer to do the styling yourself, you can edit the font, text size and button colour using the tools that appear on the left-hand side of your screen.
Table editing
To edit any text in a table, simply click on the pen tool and start editing. To add or delete a column/row, click on a table cell first, then hit the table icon (4 squares) to view more options.
If you like to find out more about table editing, here's a link for more in-depth tutorial.
Upload a PDF or file
Hover over an existing element and click on the + symbol that appears on the right side. Select "File Upload" from the menu and choose the document you'd like to upload.
Once it's uploaded, hover over to the pen tool and rename the title, e.g. Annual report 2023. You can then re-arrange the buttons to the order you prefer.
Manage pages
Dropdown menus allow you to present a list of options to your website visitors in a concise, organised manner. To create a dropdown menu, follow these steps:
Log in to your website editor.
Go to the page where you wish to add a dropdown menu.
Click the "Add" button on the right-hand side of the screen.
Select "Dropdown Menu" from the list of options.
Personalise the appearance and content of your dropdown menu to your liking.
Save and publish your changes to make the dropdown menu live on your website.
Third party widgets
A third-party integration Elfsight was used throughout the website to enhance the user experience such as:
Testimonials Slider
Number counters on both home and workplace programs pages
Our customers' logo slider
At this stage, I'm unable to provide client access for you to edit the details directly (in development). If you need any help updating the content mentioned above, please let me know by email or give me a call if you need them to be fixed sooner.
However, Elfsight offers easy-to-use widgets that you'll be able to create easily, find out more about Elfsight integration with your website. As a client of Harbrow Creations, you can also get $15 off your first paid subscription.

Blogs
If you want to add a new blog entry, select blog in the top-left menu in your dashboard. If you want your blog featured on the Our Impact page, add the relevant tag in its category - such as Raising awareness and building advocacy.
Events
To add a new event, create a new blog post containing the event details and include "events" as one of the tags.
Afterwards, access the News and Events page, duplicate the top stack and ensure that the stack designs are unlinked (this is important). Modify the stack's background and content to reflect the new event, and then link the button to the blog post you just created.
Instant quote landing page
(via Mailchimp)
To edit the instant quote landing page, simply head over to the Mailchimp account. Click on All campaigns > Challenge DV instant quote > Edit (via the drop-down menu as shown below)
Cost and structure auto replies
(via Mailchimp)
If you want to edit the cost and structure auto email responses, head to Automations > All Journeys in your MailChimp account. Search for the service you would like to edit, then select pause & edit. You can then start editing and making all of the required changes. Once you have completed the edits, be sure to turn the automation back on by clicking publish in the top right-hand corner.
Instant Quote thank you page
To edit the thank you page, login to Rocketspark Dashboard > Manage pages > Thank you for your interest
Announcement bar message
If you'd like to edit the announce bar message, please login to Rocketspark Dashboard > Change Design > Header & Menu, then you'll see the editing option just under the header spacing.
Stack background
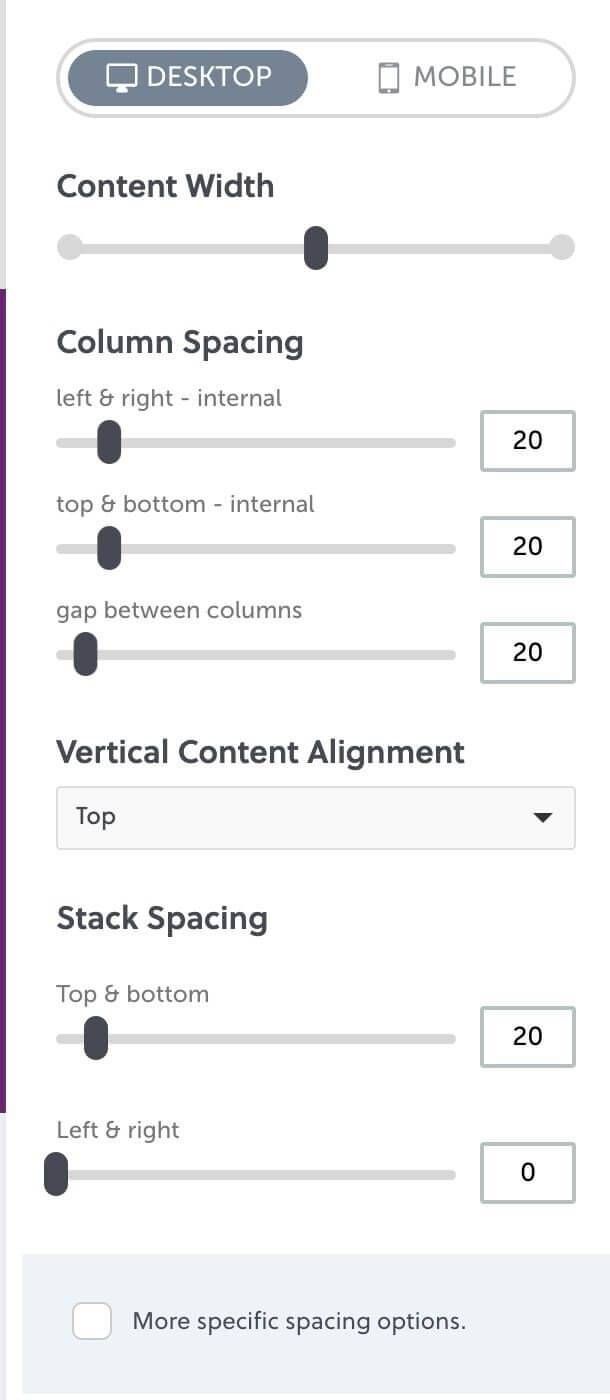
To ensure consistency across all pages, the design settings should typically be as follows:
Desktop
Left & Right - Internal: 20
Top & Bottom - Internal: 20
Gap Between Columns: 20
Vertical Content Alignment: Top
Stack Spacing Top & Bottom: 20
Stack Spacing Left & Right: 0
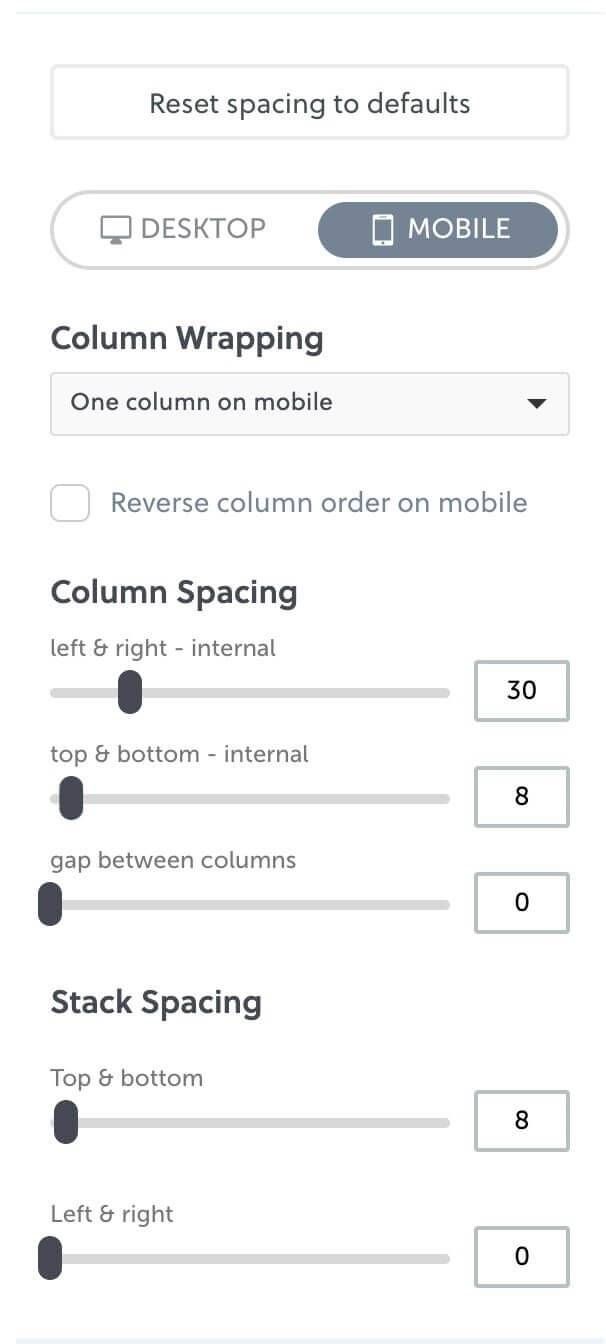
Mobile
Left & Right - Internal: 30
Top & Bottom - Internal: 8
Gap Between Columns: 0
Stack Spacing Top & Bottom: 8
Stack Spacing Left & Right: 0
Colour Specs & Fonts
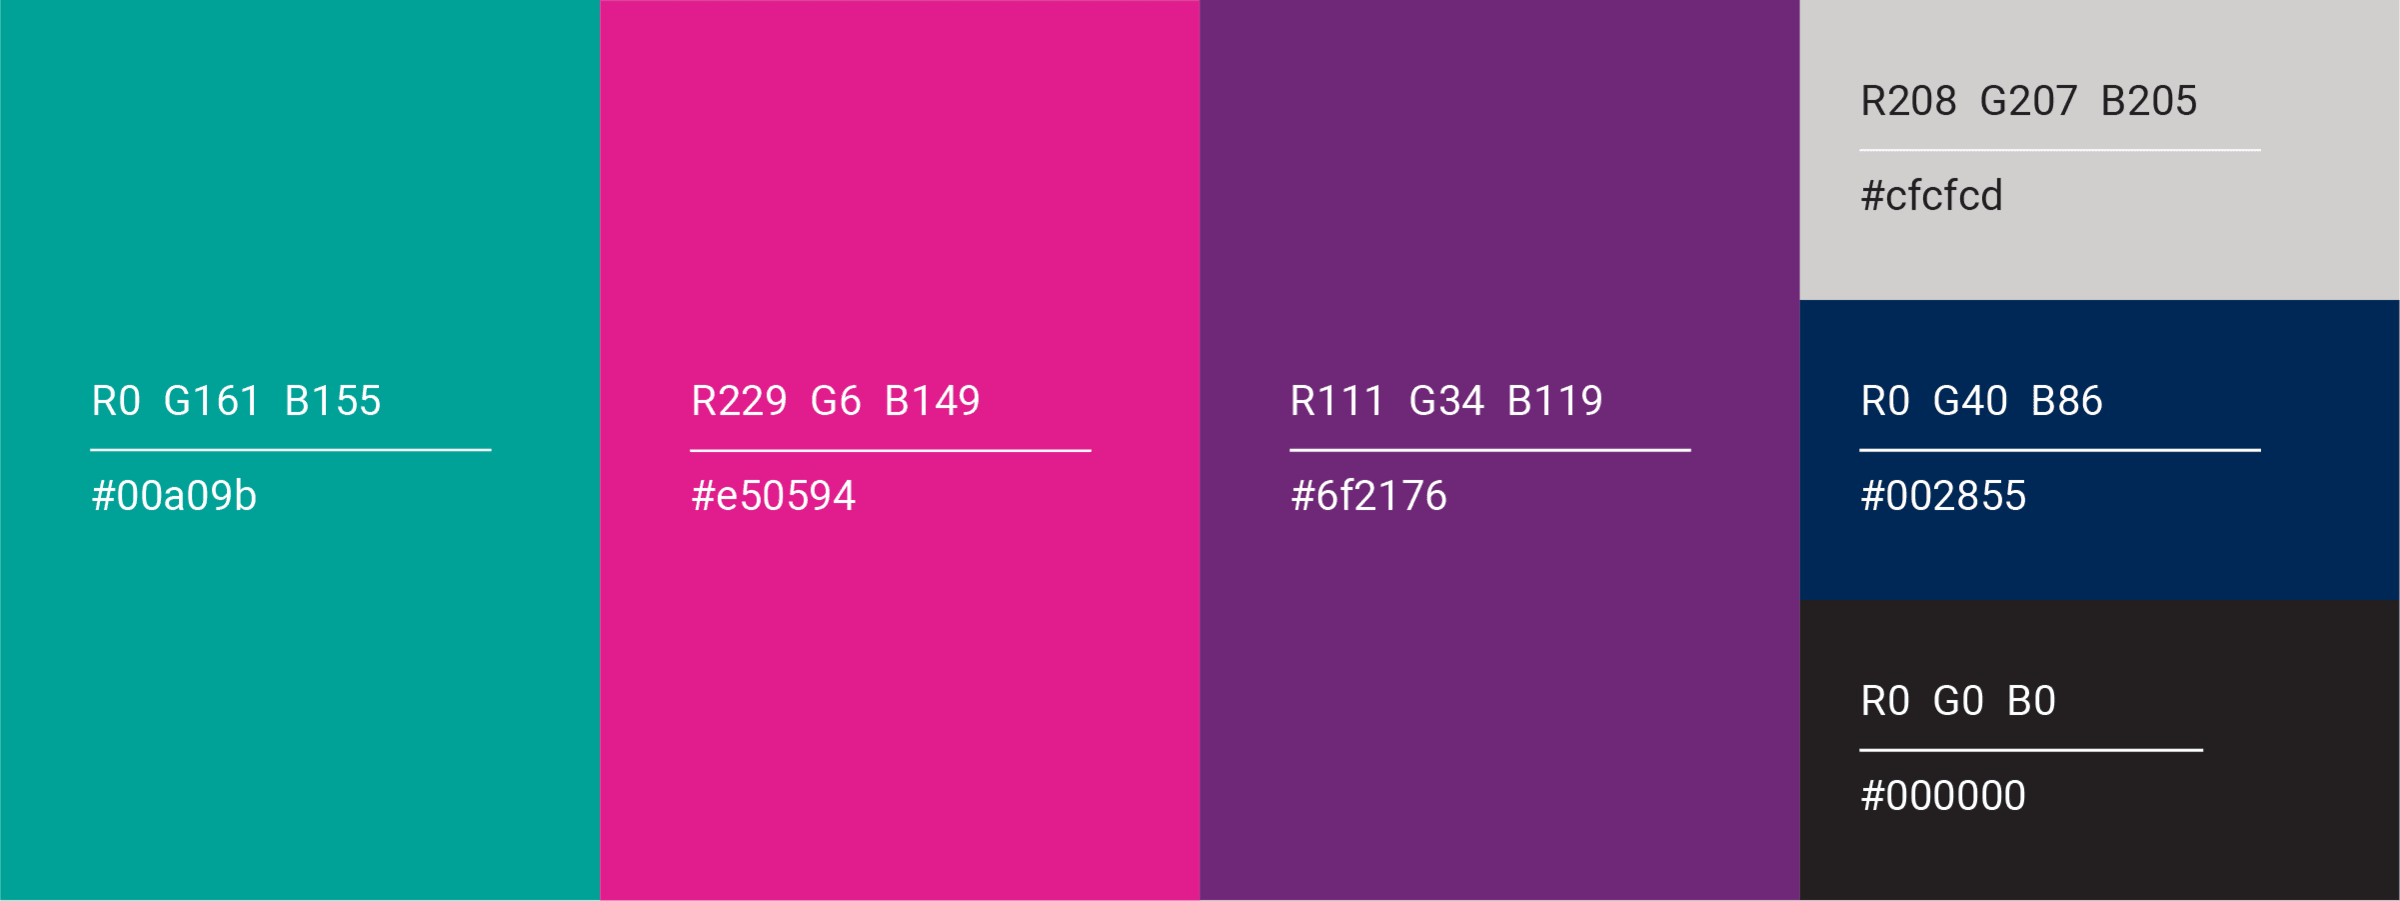
To ensure the branding is consistent, please use the following colour specs where applicable:
Teal #00A09B
Pink #E50594
Purple #6F2176
The primary font for Challenge DV website is Roboto Regular.
Resource Library by Rocketspark
Visit the resource library made by Rocketspark, which covers most topics in depth.
Need something sooner?
Feel free to contact me via:
Email: hello@harbrowcreations.com
Phone: 0433 281 921

